

Figma template guide
This guide shows how to set up Figma for Lucide icons.
Set up the frame
Create each icon in its own frame.
Use a 24 × 24 pixel frame.
- Click the frame button, or press
F. - Draw a
24 × 24frame, or set the size in the right sidebar.
Design the icon inside this frame. Name the frame after the icon so Figma exports it as frame-name.svg.
Create your icon
Set up the stroke before drawing.
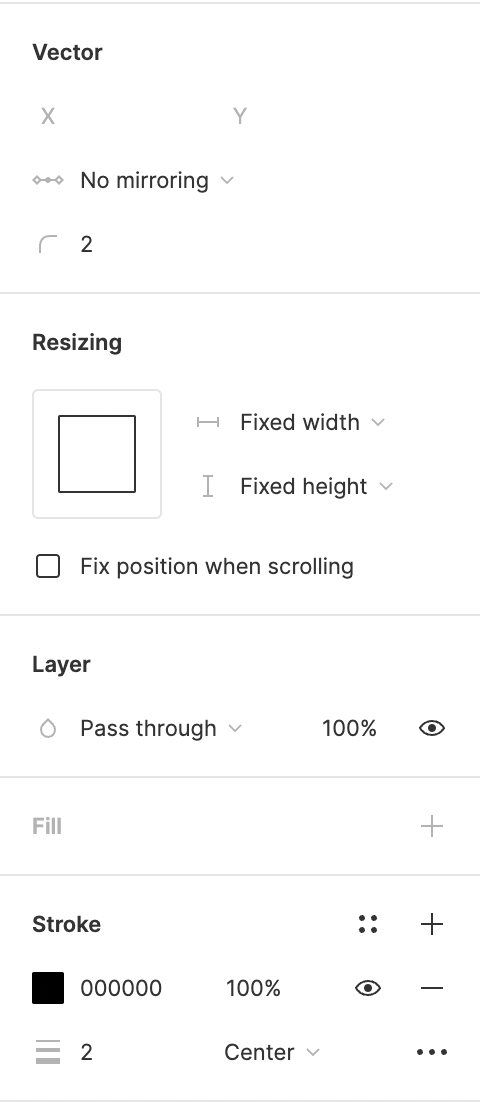
Draw in the frame with the pen tool. Open it from the toolbar or press P. After you start drawing, adjust the vector settings in the right sidebar.
Set the following:
- Vector
- Corner radius: 2px
- Stroke
- Stroke width: 2px
- Stroke alignment: center
Export or copy your icon
When your icon is ready, export it.
- Select the frame.
- Open the Export section in the right sidebar.
- Set the file type to SVG.
- Click Export.
You can also copy the SVG source.
- Select the frame.
- Right-click it.
- Choose Copy/Paste as.
- Choose Copy as SVG.
You now have an SVG to prepare for contribution.
Optimize your icon
You can optimize the exported SVG with Lucide Studio.
Check spacing in Figma
The design language requires at least 2 pixels of spacing between separate elements. In Figma, hold Option on macOS or Alt on Windows to check spacing.